Please follow these instructions for 10-14 days after the procedure to improve and prolong the results of your Microblading Procedure.
If you don’t follow these instructions, it can greatly affect your Microblading results! We have applied an ointment that will stay on and protect your brows. Avoid getting anything on the brows, including water, except for cleansing as directed. You may dab for the first few hours with sterile gauze to remove any excess fluids, if necessary. Within 2-3 hours after the procedure wash the ointment off your brows with sterile water, and dry eyebrows very well with sterile gauze. Expect treated areas to be tender for the next few days. The procedure area may be red, swollen, or have a discharge of lymph (clear fluid) and blood for at least 12 hours post-procedure. Gently dab off excess lymph from the procedure area with a clean tissue and clean (Sterilized) cold water. Remember that you should dab off gently the lymph to avoid getting a thick crust. You may alternate between ice and hot packs to relieve swelling.
- DO NOT RUB, SCRATCH, OR PICK THE TREATED AREA; pigment may be removed along with crusting tissue. Let any scabbing or dry skin naturally exfoliate off. Picking can cause scarring.
- DO NOT SOAK the treated area in the bath, pool, or hot tub. For 15 days, refrain from swimming in saltwater or chlorinated pools, saunas, hot yoga, steam rooms, or sunbeds.
- NO EXERCISE for 14 days. After 14 days – when exercising, wear a sweatband to avoid sweat on the brow area.
- DO NOT clean your brows with tap water, use only Bottled Water, or Sterile clean water. You are going to splash your brows first 3 days ONLY, with sterile water, and tap dry. (Gently)
- DO NOT touch the healing pigmented area with your fingers. Touching the treated area with your fingers, unclean cotton swabs, old products, or others, may result in infection. If you need to touch the area – use a clean cotton swab!
- DO NOT EXPOSE treated area to direct sunlight. After healed (30 days), use sunscreen to avoid fading from the sun.
- You may find that your eyebrows will scab or become slightly dry following the treatment. If they itch, DO NO SCRATCH them. You may pat them to alleviate the itch.
- If your eyebrows get wet during the healing process, pat them dry with a towel, DO NOT RUB.
- Avoid using daily skincare products directly on the eyebrows.
- If you are planning a chemical peel, or any other medical procedure, please inform the artist of the procedure you have had. The procedure should only be done once the healing process is COMPLETE.
- If you are due to give blood after the procedure, please inform your nurse about the microblading treatment you have had as this might alter the results. – If you are a blood donor, you may NOT give blood for 1 year following your permanent makeup application (according to Red Cross).
- Sleep on your back for 10 days to avoid your eyebrows getting rubbed with the pillow. Sleep on a CLEAN satin pillowcase while the procedure area is healing.
- If you have any pets, DO NOT touch your pets and then touch your eyebrows, since it could cause an infection. (Do not let your pets on your sleeping area either, if they’ve been on your bed please change your sheets)
- Do not wear makeup on the treated area until it has healed. You might cause an infection or otherwise damage the permanent makeup. – No tinting of brows until the procedure area has completely healed.
- Please DO NOT do any gardening or outdoor activities while your eyebrows are healing.
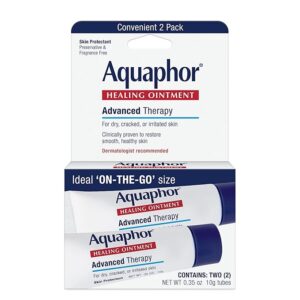
- Apply the HEALING OINTMENT (AQUAPHOR) – For 8 Days (3 times a day) Very thin layer.
Do not use too much healing ointment; overuse of your healing product will not let the area heal properly; apply a very thin layer to prevent the treated area from drying. – Please check for any allergies you might have towards the ingredients of these ointments/creams, ask your pharmacist/doctor for a replacement that will suit your skin. Other ointments might affect the final result and may require extra touch-ups to reach the desired result.
SYMPTOMS OF INFECTION
It’s normal to have some pain and discomfort during the procedure, and you might feel a slight residual stinging afterward. It’s not normal to have severe pain in the affected area. You should pay careful attention to the microbladed area to see if it becomes puffy or raised. Any sign of a yellow-tinged discharge or excessive redness could be a sign of the beginning of an infection.
Symptoms: Thick raised scab, crusty texture, redness around the skin, yellow discharge, pain, itching, swelling, tenderness of the area, purulent drainage from the procedure site the skin may feel hot around the area, red streaks going from the procedure site towards the heart, and elevated body temperature.
Please contact your primary doctor if you have an infection or reaction.
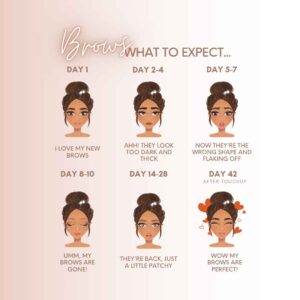
What to Expect?
- The eyebrows will appear bolder immediately after the procedure. This is common in all Permanent Makeup applications. Hair strokes will soften up as the tissue heals.
- It is very common to have areas fade more so than others. This is a part of the healing process and will be treated at the recommended touch-up appointment. Eyebrows may take 1-3 treatments to achieve the desired result.
- Scar tissue in the brow area of eyebrows done multiple times WILL require additional procedures and fees will apply.
- Touch-up visits should be scheduled between 4-8 weeks post-procedure. All permanent makeup procedures are at least a two-step process. Results cannot be determined until the color refresher is completed.
- If you resume the Retin-A, Retinol, or Retinoids after 30 days, the continued use will fade your permanent makeup prematurely.
- DO NOT USE any lightening and peeling products that contain AHA’s, Vitamin A, Retinol A, Glycolic/Lactic Acids on the treated area; it will fade your tattoo/permanent makeup prematurely. Check your product labeling. It will fade your pigment color. Read the ingredients on the back of every bottle of product that you use.